
Picture growing food in your garden even after frost hits. You can also start planting seeds earlier than usual. That’s the magic of using a polytunnel. A polytunnel works like a shield, protecting your plants. It keeps bad weather out and traps warmth inside. This lets you grow food all year without much trouble.
Polytunnel gardening has more perks than just timing. You’ll get more crops, fewer pests, and stronger plants. For example, many gardeners see big improvements in their harvests. Some advanced methods can increase crop success by over 30%. Whether you garden for fun or want a productive setup, this method changes everything.
To make your polytunnel work best, try no-dig gardening and composting. These methods keep your soil full of helpful microbes. They also reduce weeds and save you time. Think of it as creating a strong base for your garden. Healthy soil leads to healthy plants.
Key Takeaways
Pick a sunny spot with good drainage for your polytunnel. This helps plants grow better and produce more.
Try no-dig gardening to keep soil healthy and stop weeds. It makes gardening simpler and saves time.
Use vents and control temperature to keep plants safe. This stops mold and heat from harming them.
Make compost from kitchen scraps and yard waste. It adds nutrients to the soil and helps plants grow.
Rotate crops to keep soil healthy and avoid pests. This keeps your garden productive every year.
Setting Up Your Polytunnel

Choosing the Best Location for Your Polytunnel
Finding the right spot for your polytunnel is key. Pick a place with lots of sunlight all day. Plants grow better with steady light. Stay away from areas shaded by trees or buildings. If your yard is windy, place the polytunnel near a hedge or fence. This helps block strong winds and keeps it safe.
Think about drainage too. Choose flat or slightly sloped ground. This stops water from pooling around the polytunnel. Too much water can make soil soggy and harm plants. Watch your yard after heavy rain to see how water moves.
Tip: Set up your polytunnel from north to south. This gives it more sunlight and keeps the inside temperature steady. Studies show location affects temperature and humidity. Picking the right spot boosts your harvest.
Feature | Trial B (no plants) | |
|---|---|---|
Temperature | Big changes | N/A |
Humidity | Changes often | Lower average |
Light Levels | Different amounts | N/A |
Night Temp | Below 77°F | N/A |
Day Temp Changes | Better for plants | N/A |
Planning the Layout for Efficient Gardening
After choosing the spot, plan the inside layout. A good setup makes gardening easier. Divide the space into planting beds and paths. Raised beds are great for better drainage and easy care.
Make paths wide enough to walk comfortably. Paths about 18-24 inches wide work well. Use wood chips or gravel for paths. These stop weeds and keep soil moist.
Group plants with similar needs together. For example, tomatoes and cucumbers both like warm, sunny spots. This helps them grow better. A smart layout uses space well and makes caring for plants simple.
Pro Tip: Save space for a small storage area inside. Keep tools, watering cans, or a compost bin there. This saves trips to your garden shed.
Preparing the Ground with No-Dig Methods
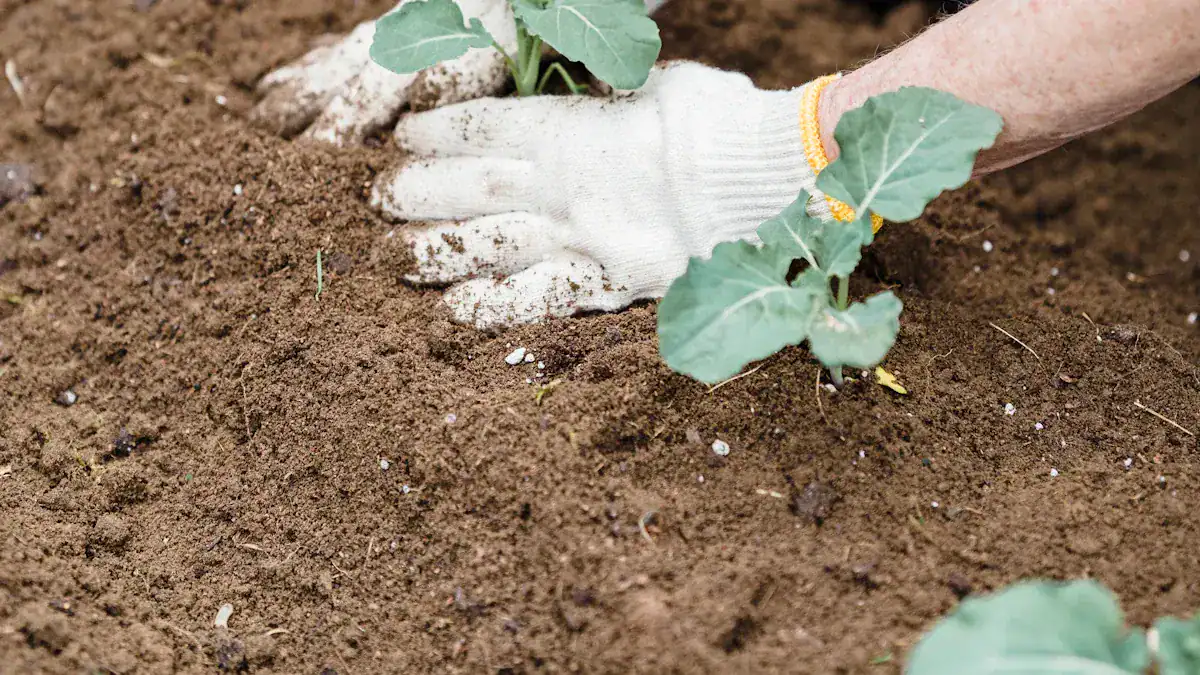
Now it’s time to get the ground ready. No-dig gardening skips hard digging but still works great. First, cover the ground with thick cardboard. This blocks weeds and grass, giving you clean soil.
Next, spread compost over the cardboard. Mushroom compost is a good choice. It’s full of nutrients for crops like tomatoes and cucumbers. Spread it evenly about 4-6 inches deep. This makes rich soil for strong plants.
No-dig gardening has many benefits:
It’s easier than digging.
Leaving soil untouched helps good microbes and fungi grow. These tiny helpers break down organic matter for plant nutrients. Even tough weeds are controlled as compost blocks their growth.
If you’re new to no-dig gardening, don’t worry. It’s easy and works well for polytunnels. Plus, it’s eco-friendly and keeps soil healthy for years.
Ventilation and Temperature Control Tips
Keeping your polytunnel at the right temperature is important. Too much heat can harm plants, and poor airflow causes mold. Don’t worry—controlling air and temperature is simple. Follow these tips to help your plants thrive.
Why Ventilation Matters
Good airflow helps plants stay healthy. Fresh air moves through the polytunnel, balancing humidity. Without it, moisture builds up, causing mildew and other problems. Ventilation also keeps temperatures steady, especially on hot days.
Tip: Ventilation is like lungs for your polytunnel. Better airflow means healthier plants.
Easy Ways to Ventilate Your Polytunnel
You don’t need expensive tools for better airflow. Try these simple ideas:
Open the doors: Keep doors open during the day. This lets fresh air in and hot air out.
Use side vents: Open side vents often if your polytunnel has them. They help lower humidity.
Add mesh screens: Put mesh screens on openings. They keep pests out but allow air to flow.
Controlling Temperature Inside Your Polytunnel
Polytunnels can get very hot, especially in summer. Keeping the temperature steady helps plants grow well. Here’s how to manage it:
Shade cloths: Use shade cloths on sunny days. They block sunlight and cool the inside.
Watering schedules: Water plants early morning or late afternoon. This avoids heat stress.
Thermometers: Place a thermometer inside to check daily temperature changes.
Pro Tip: Most crops grow best between 77°F and 86°F. Higher temperatures can harm plants.
Adjusting for Seasons
Each season needs different care. In winter, close doors to keep heat inside. Bubble wrap insulation can also help. In summer, focus on airflow and shading to avoid overheating.
Season | Ventilation Strategy | Temperature Control Tips |
|---|---|---|
Winter | Close doors, seal openings | Use bubble wrap insulation |
Summer | Open doors and vents | Use shade cloths, water plants |
Bonus Tip: Automate Ventilation
Make things easier by using automatic vent openers. These tools open vents when it’s hot and close them when it cools. They’re great for busy gardeners who can’t check daily.
Emoji Reminder: 🌱 Plants love fresh air and steady temperatures. Keep airflow steady, and your plants will grow happily!
By using these tips, you’ll create the best environment for your plants. Ventilation and temperature control may seem hard, but with practice, it gets easier.
No-Dig Gardening Basics for Polytunnel Gardening
Understanding the Principles of No-Dig Gardening
No-dig gardening is all about working with nature instead of against it. The idea is simple: you avoid disturbing the soil by skipping the digging. This method keeps the soil structure intact, which is great for your plants. Healthy soil is like a bustling city underground, full of worms, microbes, and fungi. These tiny helpers break down organic matter, release nutrients, and improve plant growth.
In a polytunnel, no-dig gardening works wonders. It creates a wildlife-friendly environment while supporting year-round growth. By leaving the soil undisturbed, you allow beneficial organisms to thrive. These organisms help your plants grow stronger and more resilient. Plus, no-dig gardening saves you time and effort. Instead of digging, you focus on layering materials and letting nature do the hard work.
Quick Tip: Think of your soil as a living ecosystem. The less you disturb it, the healthier it becomes.
Creating a No-Dig Bed in Your Polytunnel
Setting up a no-dig bed in your polytunnel is easier than you might think. Follow these steps to get started:
Clear the Area: Remove any large debris like rocks or sticks from the ground. Don’t worry about weeds—they’ll be taken care of in the next step.
Lay Down Cardboard: Cover the ground with thick cardboard. This blocks weeds and grass from growing. Overlap the edges to make sure no light gets through.
Add Compost: Spread a layer of compost over the cardboard. Mushroom compost works well because it’s rich in nutrients. Aim for a depth of 4-6 inches.
Water the Layers: Lightly water the compost to help it settle and start breaking down.
Plant Your Crops: Once the bed is ready, plant your seeds or seedlings directly into the compost.
That’s it! You’ve created a no-dig bed that’s perfect for growing food in your polytunnel. This method not only saves time but also improves soil health over time.
Pro Tip: Use pathways made of wood chips or gravel between your beds. This keeps weeds at bay and makes it easier to move around your polytunnel greenhouse.
Layering Materials for Optimal Soil Health
Layering is the secret to a thriving no-dig garden. Each layer plays a role in improving soil health and supporting plant growth. Here’s how to do it:
Start with Cardboard: This acts as a weed barrier and provides a clean base for your bed.
Add Organic Matter: Spread a thick layer of compost or well-rotted manure. This is where your plants will get their nutrients.
Top with Mulch: Use materials like straw, wood chips, or sheep wool as mulch. Mulch helps retain moisture, insulates the soil, and deters pests.
These layers work together to create a rich, fertile environment for your plants. Worms are especially attracted to the surface mulch. They burrow deeper into the soil, improving aeration and moisture retention. The table below highlights some key benefits of no-dig gardening for soil health:
Evidence | Explanation |
|---|---|
This promotes deeper soil penetration, enhancing moisture retention and drainage. | |
The worm’s action helps aerate the soil | Aeration allows for better oxygen flow, which is crucial for soil health and moisture retention. |
Soil structure is maintained | Minimal disturbance to soil structure supports moisture retention and the health of beneficial microorganisms. |
By layering materials, you create a self-sustaining system that keeps your soil healthy and productive. This approach is perfect for polytunnel gardening, where maintaining soil moisture and structure is essential.
Note: Refresh your mulch layer every few months to keep your soil in top condition.
Weed Management Without Digging
Weeds can be a real headache, but you don’t need to dig them out to keep your polytunnel tidy. With a few simple techniques, you can stop weeds from taking over while keeping your soil healthy. Let’s dive into some easy, no-dig methods for weed control.
1. Start with a Strong Foundation
The best way to manage weeds is to stop them before they start. When setting up your polytunnel gardening space, cover the ground with thick cardboard or landscape fabric. This creates a barrier that blocks sunlight, preventing weeds from sprouting. Overlap the edges of the cardboard to make sure no gaps let weeds sneak through.
Tip: Wet the cardboard before adding compost. This helps it break down faster and stick to the ground, making it harder for weeds to grow.
2. Mulch, Mulch, Mulch
Mulching is your secret weapon against weeds. Spread a thick layer of organic mulch, like straw, wood chips, or sheep wool, over your planting beds. Mulch smothers weeds by cutting off their access to light and air. It also keeps the soil moist and adds nutrients as it breaks down.
How much mulch do you need? Aim for a layer about 2-4 inches deep.
When to refresh it? Add more mulch every few months to keep weeds under control.
3. Pull Weeds Early and Often
Even with the best prevention, a few weeds might still pop up. Don’t wait for them to take over. Pull them out as soon as you see them. The smaller the weed, the easier it is to remove. Since the soil in a no-dig garden stays loose, you can usually pull weeds by hand without much effort.
Pro Tip: Weed after watering or rain. Wet soil makes it easier to pull weeds out by the roots.
4. Use Pathways to Your Advantage
Weeds love to grow in neglected areas, like pathways. Cover your paths with materials like gravel, wood chips, or even old carpet. These materials block weeds and make it easier to move around your polytunnel. Plus, they give your garden a neat, organized look.
Pathway Material | Benefits | Maintenance Tips |
|---|---|---|
Wood Chips | Retains moisture, eco-friendly | Add a fresh layer yearly |
Gravel | Long-lasting, good drainage | Rake occasionally to level it |
Old Carpet | Reuses materials, blocks weeds | Check for wear and replace |
5. Crowd Out the Weeds
Plant your crops close together to leave less room for weeds to grow. This method, called “companion planting,” not only reduces weeds but also helps your plants thrive. For example, leafy greens like lettuce can shade the soil, making it harder for weeds to sprout.
6. Stay Consistent
Weed management isn’t a one-time job. Regularly check your polytunnel for weeds and deal with them quickly. A few minutes of weeding each week can save you hours of work later.
Emoji Reminder: 🌱 Healthy plants grow best in weed-free soil. Stay on top of weeds, and your garden will thank you!
By following these no-dig weed management tips, you’ll keep your polytunnel gardening space clean and productive. Plus, you’ll spend less time battling weeds and more time enjoying your garden.
Composting Techniques for Your Polytunnel
Starting a Composting System at Home
Setting up a compost system at home is simple. You don’t need fancy tools or a large yard. Just pick a sunny or partly shaded spot in your garden. Sunlight helps break down materials faster, especially in cooler weather.
Start by collecting kitchen scraps like fruit peels and veggie leftovers. Add yard waste such as grass clippings, dried leaves, and small twigs. Layer these items in your compost bin or pile. Alternate between “green” items (like food scraps) and “brown” items (like dried leaves). This mix helps the compost break down properly.
Keep the compost damp but not too wet. If it feels dry, sprinkle some water on it. Turn the pile every two weeks to mix it and add air. This helps microbes work faster to break down the waste. In a few months, you’ll have rich compost ready for your polytunnel.
Tip: Short on space? Use a small bin inside your polytunnel. This lets you recycle plant waste into compost right where you grow.
Choosing the Right Materials for Composting
Not everything belongs in a compost pile. Picking the right items is important. Use organic waste that breaks down easily. Here’s a quick guide:
Green Materials: Food scraps, coffee grounds, fresh grass clippings.
Brown Materials: Dried leaves, cardboard, shredded paper, straw.
Avoid: Meat, dairy, oily foods, or anything with chemicals.
Green items add nitrogen, which helps microbes grow. Brown items provide carbon, giving the compost structure. Together, they create the perfect mix for breaking down waste. If using cardboard, remove tape or glossy parts. These slow the process.
Pro Tip: Mushroom compost is great for polytunnels. It’s full of nutrients and helps crops like tomatoes grow better.
Using Compost to Enrich No-Dig Beds
Compost is key to healthy no-dig beds in your polytunnel. Spread a thick layer of compost on your planting beds each year. This keeps the soil full of nutrients and organic matter. Compost also improves drainage and holds moisture, which is ideal for your garden.
To use compost, first clear any debris from the bed. Spread the compost evenly, about 4-6 inches deep. Don’t mix it into the soil—just leave it on top. Over time, the compost will naturally blend into the soil. This keeps the soil structure strong and helps worms and microbes thrive.
Quick Tip: Add fresh compost every year to keep your soil fertile. This simple step ensures your polytunnel stays productive all year.
Using compost means you won’t need chemical fertilizers. It’s a natural way to feed plants and protect the environment. With good compost, your crops will grow healthier and stronger.
Maintaining Compost Quality and Troubleshooting
Keeping your compost in top shape doesn’t have to be complicated. With a little attention, you can ensure it stays healthy and breaks down efficiently. Let’s dive into some simple ways to maintain compost quality and tackle common problems.
1. Keep the Right Balance
Compost works best when you balance “green” and “brown” materials. Greens, like fruit scraps and grass clippings, add nitrogen. Browns, like dried leaves and cardboard, provide carbon. A good rule of thumb is to use two parts brown to one part green.
Tip: If your compost smells bad, it might have too many greens. Add more browns to fix it.
2. Monitor Moisture Levels
Compost should feel like a damp sponge—not too wet or too dry. If it’s too dry, sprinkle water over it. If it’s too wet, mix in dry materials like straw or shredded paper.
Problem | Cause | Solution |
|---|---|---|
Too Dry | Not enough water | Add water and mix well |
Too Wet | Excess greens or rain | Add dry browns like straw |
3. Turn the Pile Regularly
Turning your compost adds oxygen, which speeds up decomposition. Use a garden fork or compost aerator to mix the pile every 1-2 weeks. This also prevents it from becoming compacted.
Pro Tip: If you notice your compost isn’t heating up, turning it can help restart the process.
4. Watch Out for Pests
Unwanted visitors like rodents or flies can show up if you add the wrong items. Avoid meat, dairy, and oily foods. Cover food scraps with a layer of browns to keep pests away.
5. Troubleshoot Common Issues
Sometimes, compost doesn’t go as planned. Here’s how to handle a few common problems:
Bad Smell: Add more browns and turn the pile.
Pile Not Breaking Down: Check the moisture and green-to-brown ratio.
Too Many Flies: Bury food scraps deeper or cover them with soil.
Emoji Reminder: 🌱 Healthy compost = happy plants. Keep an eye on your pile, and it’ll reward you with rich, nutrient-packed soil.
By following these tips, you’ll keep your compost system running smoothly. A little care goes a long way in creating the perfect compost for your polytunnel garden.
Seasonal Maintenance for Polytunnel Gardening
Spring and Summer Care for Your Polytunnel
Spring and summer are exciting times for your polytunnel. Plants grow quickly, and your garden bursts with life. To keep everything thriving, focus on maintaining the right environment. Start by checking the ventilation. Open doors and vents daily to let fresh air in and reduce humidity. This prevents mold and keeps your plants healthy.
Watering is another key task. Early mornings are the best time to water. This gives plants a chance to absorb moisture before the heat of the day. Use a drip irrigation system if you want to save time and water. Mulching your beds with straw or wood chips helps retain moisture and keeps the soil cool.
Keep an eye on pests. Warmer months bring more bugs. Use natural pest control methods like introducing ladybugs or spraying neem oil. Regularly inspect your plants for signs of trouble.
Did You Know? Polytunnels can create unique conditions. For example, they can retain up to 98% dry matter in cowpats compared to just 58% in open fields. This shows how well they protect against external elements.
Preparing for Fall and Winter Gardening
As the weather cools, it’s time to prepare your polytunnel for fall and winter. Start by inspecting the structure. Check for any damage and repair it to ensure it can handle harsh weather. Secure the covering tightly to prevent it from tearing during storms.
Clear out old plants and debris from your growing areas. This minimizes the risk of pests and diseases overwintering in your garden. Add a fresh layer of compost to your beds to enrich the soil for the next season. Bubble wrap insulation can help retain heat, keeping your plants cozy during cold nights.
Tip: Don’t forget to secure loose items around your polytunnel. Strong winds can turn them into hazards.
Crop Rotation Strategies for Healthy Soil
Crop rotation is a simple way to keep your soil healthy and productive. The idea is to grow different types of plants in the same area each year. This prevents nutrient depletion and reduces the risk of pests and diseases.
Divide your polytunnel into sections. Rotate crops like tomatoes, cucumbers, and leafy greens between these sections annually. For example, if you grew tomatoes in one bed this year, plant leafy greens there next year. This keeps the soil balanced and supports better growing conditions.
Pro Tip: Legumes like peas and beans fix nitrogen in the soil. Plant them after heavy feeders like tomatoes to naturally replenish nutrients.
By following these seasonal maintenance tips, you’ll keep your polytunnel productive all year. Each season brings its own challenges, but with a little care, your garden will thrive.
Natural Pest Control Methods
You don’t need strong chemicals to keep pests away. Natural pest control is safe, works well, and helps the environment. Here are simple ways to protect your garden from pests.
1. Welcome Helpful Bugs
Some bugs are good for your garden! Ladybugs and lacewings eat harmful pests like aphids. To attract them, plant flowers like marigolds, dill, or yarrow near your crops. These flowers bring in helpful insects.
Tip: Don’t use sprays, even natural ones, as they can harm good bugs.
2. Plant Pest-Fighting Friends
Some plants keep pests away naturally. For example, basil scares off flies, and nasturtiums stop aphids. Plant these near your crops to protect them.
Crop | Helper Plant | Pests Kept Away |
|---|---|---|
Tomatoes | Basil, Marigolds | Aphids, Whiteflies |
Cucumbers | Nasturtiums, Radishes | Cucumber Beetles |
Lettuce | Chives, Garlic | Slugs, Aphids |
3. Use Covers to Block Pests
Simple covers can stop pests from reaching your plants. Use fine mesh or fleece to protect crops from bugs like caterpillars. Make sure the edges are sealed so pests can’t sneak in.
4. Keep Your Garden Tidy
Pests hide in dead leaves and weeds. Clean up old plants and debris often. This gives pests fewer places to live and lay eggs.
Pro Tip: Sweep paths and check corners for pests. A clean garden keeps bugs away.
5. Make Your Own Sprays
Homemade sprays can help fight pests. Mix water, a little dish soap, and cayenne pepper. Spray it on plants with aphids or mites.
Emoji Reminder: 🐞 A clean, pest-free garden grows better! Use these tips to protect your plants naturally.
By using these easy pest control methods, your polytunnel will stay healthy and eco-friendly. Your plants will grow stronger and give you bigger harvests!
Starting your DIY polytunnel garden is easier than it seems. First, place your polytunnel in a sunny area with good drainage. Next, make no-dig beds by layering cardboard and compost. Then, set up a compost system to turn waste into rich soil. These steps help create a healthy and productive garden.
Polytunnel gardening has many advantages. It improves soil, shields plants, and lets you grow longer. No-dig gardening keeps soil strong and stops erosion. Composting adds nutrients and supports eco-friendly gardening. These methods work together for a successful and green garden.
Why wait? Your DIY polytunnel is perfect for growing fresh crops. Start now and enjoy a thriving garden!
FAQ
What can I grow in my polytunnel?
You can grow almost anything! Popular choices include tomatoes, cucumbers, peppers, and leafy greens. Herbs like basil and parsley also thrive. In cooler months, try carrots, spinach, or kale. Your polytunnel creates a controlled environment, so experiment with different crops to see what works best.
How often should I water plants in a polytunnel?
Watering depends on the season and the crop. In summer, water daily or every other day. During cooler months, reduce watering to once or twice a week. Always check the soil—if it feels dry an inch below the surface, it’s time to water.
Can I use kitchen scraps directly in my no-dig beds?
No, you shouldn’t add raw kitchen scraps directly to your beds. Compost them first to break them down into nutrient-rich material. This ensures your plants get the best nutrients without attracting pests or causing unpleasant smells.
How do I stop pests in my polytunnel without chemicals?
Use natural methods like planting pest-repelling herbs (e.g., basil or marigolds). Introduce helpful insects like ladybugs. Cover crops with fine mesh to block pests. Keep your polytunnel clean by removing dead leaves and debris regularly.
Do I need to rotate crops in a polytunnel?
Yes, crop rotation is essential. It prevents soil nutrient depletion and reduces pests and diseases. Divide your polytunnel into sections and rotate crops like tomatoes, cucumbers, and leafy greens each year. This keeps your soil healthy and productive.
Tip: Keep a garden journal to track what you plant and where each season.
See Also
Mastering Your Poly Tunnel: The Complete No-Dig Gardening Guide
7 Key Inquiries to Make for Healthier Food Selections
Reduce Processed Foods: Easy Alternatives Using Local Produce
20 Wellness Strategies for a Thriving Life in 2025
Drawing Local Shoppers to Farms with Online Directory Benefits